Your car’s headlights are like its eyes, guiding you safely through the darkness. But over time, they can become cloudy and dull, diminishing their effectiveness and making your vehicle look less appealing. Learn how to Clean Headlights on a Car and restore their clarity and brightness.
You might not realize it, but clean headlights aren’t just about aesthetics—they’re crucial for your safety on the road. Imagine cruising down a dimly lit street with crystal-clear lights that illuminate every curve and obstacle. Sounds great, right? This guide will show you how to achieve that with simple, effective steps.
You’ll discover easy methods to restore your headlights to their original shine, making night drives safer and your car look fresher. Ready to see better and drive safer? Let’s dive in and transform your headlights!
Importance Of Clean Headlights
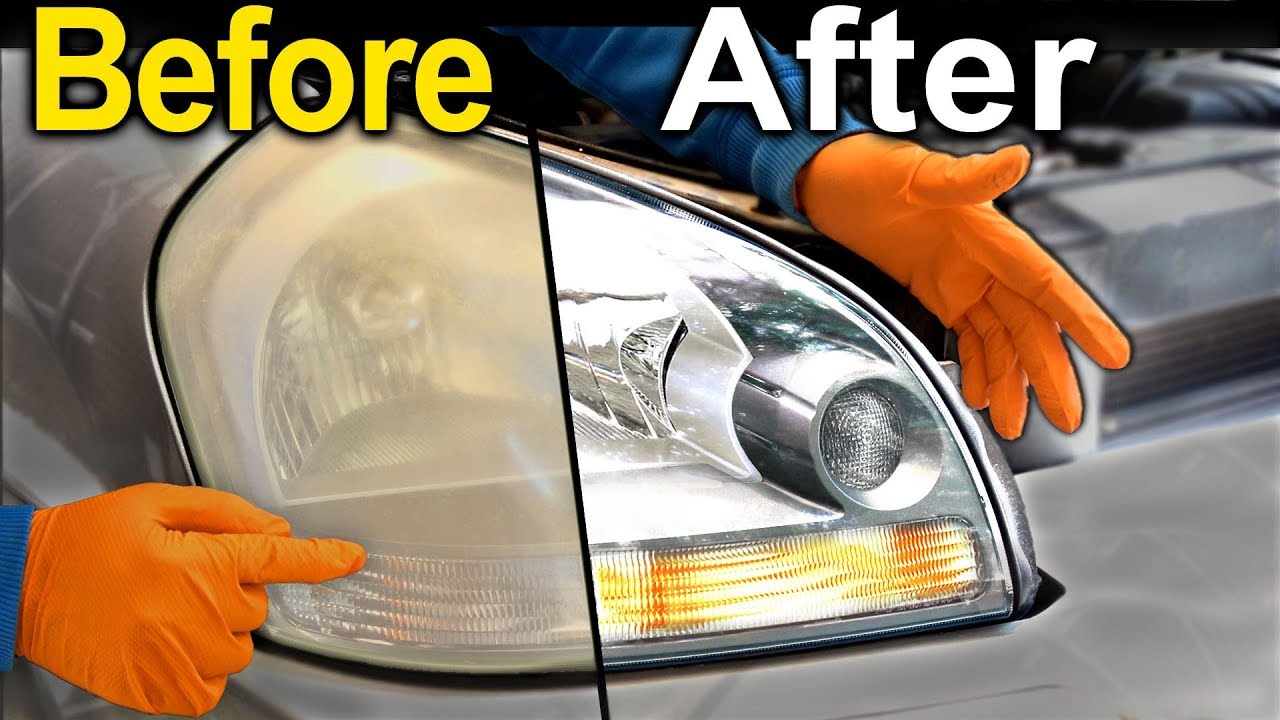
Headlights play a crucial role in ensuring safe driving, especially at night or during bad weather. Yet, they often get overlooked. Over time, dirt and grime can build up on them, reducing their brightness and clarity. Keeping them clean is not just about aesthetics; it’s about safety. Clean headlights ensure better visibility, helping you spot obstacles and other vehicles sooner. This can prevent accidents and keep you and others safe on the road.
Why Clean Headlights Matter
Clear headlights improve visibility, especially during nighttime or foggy conditions. A well-maintained headlight can illuminate the road better, reducing the risk of accidents. Dirty headlights scatter light, making it hard to see the road and other vehicles.
Legal Implications Of Dim Headlights
Driving with dim or cloudy headlights might lead to legal issues. Many regions have laws requiring headlights to be clear and bright. Fines or penalties could be imposed if your headlights don’t meet these standards. Regular cleaning ensures compliance and keeps you on the right side of the law.
Enhancing Aesthetic Appeal
Beyond safety, clean headlights improve your car’s appearance. They add to the overall shine and appeal of your vehicle. A well-maintained car reflects your care and attention to detail. It can even increase the resale value of your car.
Extending Headlight Lifespan
Dirt and grime can cause wear and tear on your headlights over time. Regular cleaning helps to prevent this, extending their lifespan. This means fewer replacements and more savings in the long run. A simple cleaning routine can protect your investment.
Basic Steps To Clean Headlights
- Gather materials: mild soap, water, microfiber cloth, and a cleaning solution.
- Wash the headlights with soap and water to remove surface dirt.
- Apply the cleaning solution according to the instructions.
- Buff the headlights with a clean cloth for a clear finish.
Keeping your car’s headlights clean is simple yet vital. It ensures safety, legal compliance, and enhances your vehicle’s look. Plus, it saves you money by reducing the need for replacements. A few minutes of care can make a big difference.

Common Headlight Issues
Car headlights are crucial for safe driving, especially at night. Over time, they can develop issues that impact visibility. Understanding these common headlight problems can help in maintaining them effectively. Regular cleaning can prevent many issues from worsening. Below, explore the typical headlight problems you might encounter.
Yellowing
Yellowing is a common issue with car headlights. This often results from prolonged exposure to UV rays. The sun’s rays can cause the headlight’s plastic cover to degrade, leading to a yellow tint. This tint reduces the brightness of the headlights, affecting visibility during night driving.
To combat yellowing, consider these simple steps:
- Use a headlight restoration kit: These kits often include a special cleaner and a buffing tool.
- Apply toothpaste: An affordable and simple method. Rub toothpaste on the headlights with a cloth, then rinse.
- Sand and polish: Sand the surface with fine-grit sandpaper, then polish with a plastic-safe product.
Regular maintenance can prevent yellowing. Always park your car in the shade when possible. This limits UV exposure.
Fogging
Fogging occurs when moisture gets trapped inside the headlight casing. This moisture leads to condensation, obstructing light output. Foggy headlights can make night driving dangerous.
Here are some ways to address fogging:
- Check for seal leaks: Inspect the headlight seals for gaps or damage. Replace seals if necessary.
- Use silica gel packs: Place silica gel packs inside the headlight casing to absorb moisture.
- Heat the headlights: Use a hairdryer on low heat to evaporate trapped moisture.
Avoid washing your car in direct sunlight. This can cause quick temperature changes and lead to fogging.
Scratches
Scratches on headlights can scatter light, reducing clarity. These scratches often result from debris or improper cleaning techniques. It’s important to address them promptly to ensure maximum visibility.
To fix scratched headlights, follow these steps:
| Method | Details |
|---|---|
| Sanding | Use wet sandpaper to gently sand the scratches, then polish. |
| Buffing | Buff with a plastic polish using a soft cloth or buffer. |
| Commercial kits | Purchase kits designed for headlight scratch removal. |
Always clean headlights with a soft cloth. Avoid harsh chemicals and rough materials. This prevents further damage.
Diy Cleaning Methods
Cleaning headlights can make your car look new and improve night driving. Many people think it’s hard to clean headlights, but it’s not. With a few household items, you can clear away the foggy, yellow look from your headlights. Let’s explore some easy DIY cleaning methods to help you get started.
Toothpaste Technique
The toothpaste technique is one of the simplest ways to clean headlights. Toothpaste contains mild abrasives that can remove dirt and fog. Here’s how you can do it:
- Materials Needed: Toothpaste (non-gel), a soft cloth, water, and a spray bottle.
- Step 1: Wash the headlights with water to remove loose dirt.
- Step 2: Squeeze a small amount of toothpaste onto the cloth.
- Step 3: Rub the toothpaste in circular motions on the headlight.
- Step 4: Rinse with water and wipe with a clean cloth.
Repeat these steps if needed. Toothpaste can effectively remove a layer of grime, making your headlights clearer.
Baking Soda Paste
Baking soda is another common household item useful for cleaning. It works well on plastic surfaces like headlights. Follow these steps to use baking soda:
- Materials Needed: Baking soda, water, a soft cloth, and a spray bottle.
- Step 1: Mix baking soda with water to form a thick paste.
- Step 2: Apply the paste to the headlight using the cloth.
- Step 3: Scrub gently in circular motions to avoid scratching.
- Step 4: Rinse with water and dry with a clean cloth.
This method helps in breaking down the cloudiness on the headlight surface. Baking soda is gentle yet effective for maintaining clear headlights.
Vinegar Solution
Vinegar is a natural cleaner that can cut through grime and restore clarity. This method is budget-friendly and easy to do:
- Materials Needed: White vinegar, water, a spray bottle, and a soft cloth.
- Step 1: Mix equal parts of vinegar and water in a spray bottle.
- Step 2: Spray the solution onto the headlights.
- Step 3: Let it sit for a few minutes to loosen the dirt.
- Step 4: Wipe with the cloth in circular motions.
Use vinegar to break down tough stains and dirt. It’s a natural way to keep your headlights clear and bright.
Using Headlight Restoration Kits
Over time, car headlights can become cloudy and less effective. This not only affects the look of your car but also its performance, especially at night. Using headlight restoration kits is a practical solution. These kits are designed to clean and restore clarity to your headlights, improving both appearance and safety.
Choosing The Right Kit
With so many options available, picking the right headlight restoration kit can seem overwhelming. Consider the following factors to make the best choice:
- Ease of Use: Look for a kit that includes clear instructions and requires minimal tools.
- Components: Ensure the kit comes with everything needed, such as sandpapers, polishing compound, and sealant.
- Reviews and Ratings: Check customer reviews to gauge effectiveness and ease of use.
- Price: Compare prices to find a kit that fits your budget without compromising on quality.
Here’s a simple comparison table to help you decide:
| Feature | Option A | Option B |
|---|---|---|
| Ease of Use | Simple | Moderate |
| Components Included | Complete | Partial |
| Price | $$ | $$$ |
Each kit has its pros and cons. Choose based on your specific needs and skill level. A good kit can make the restoration process smoother and more effective.
Step-by-step Process
Once you have your kit, follow these steps to restore your headlights:
- Preparation: Clean the headlights with soap and water. Dry completely.
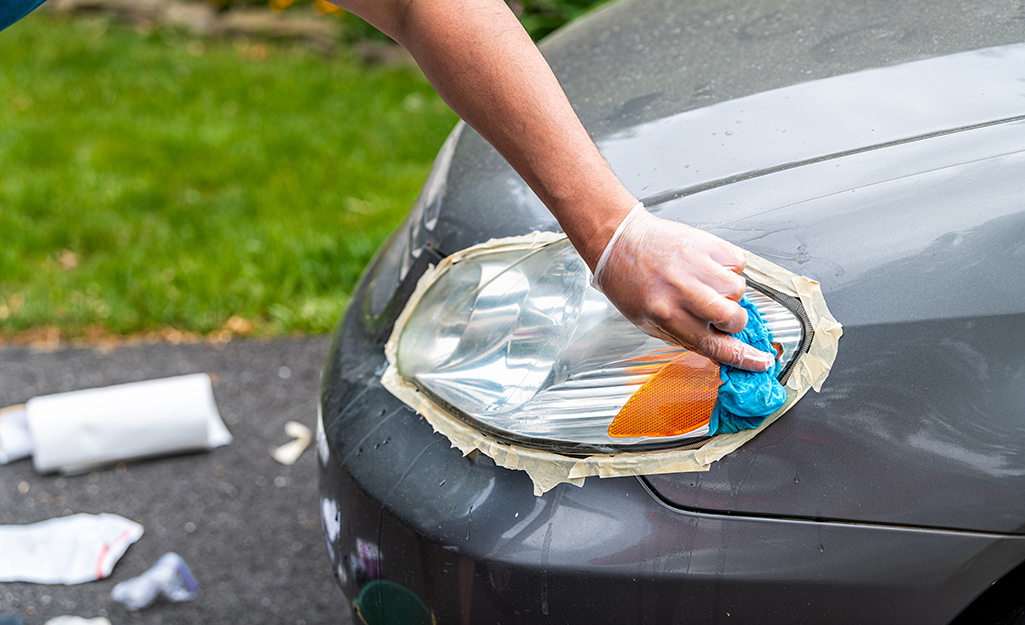
- Taping: Use masking tape to protect the areas around the headlight.
- Sanding: Start with the lowest grit sandpaper included in the kit. Sand the headlight in a circular motion.
- Progressive Sanding: Gradually use finer grit sandpapers. This removes deeper scratches and polishes the surface.
- Polishing: Apply the polishing compound. Use a soft cloth to rub in a circular motion until clear.
- Sealing: Apply the sealant to protect the headlight from future damage.
Take your time with each step for the best results. This ensures a clear and long-lasting finish. Remember, patience is key. Each step prepares the surface for the next, resulting in a bright, clear headlight.
Professional Services
Cleaning headlights on a car is essential for safety and appearance. While DIY methods are popular, sometimes professional services offer a more thorough solution. These services not only clean but also restore headlights to their original clarity. Professional expertise ensures that headlights are free from scratches, fog, and yellowing. This can enhance visibility and the overall look of your vehicle. Knowing when to opt for professional cleaning and understanding what it entails can help you make an informed decision.
When To Consider
Professional services become necessary under certain conditions. Here are some scenarios where you might want to consider seeking expert help:
- Deep Scratches: If your headlights have deep scratches, DIY methods might not suffice. Professionals have tools to buff out scratches and restore clarity.
- Severe Yellowing: Over time, UV rays cause headlights to yellow. When this happens severely, professional cleaning can effectively remove the yellow layer.
- Foggy Appearance: Foggy headlights reduce visibility. Professionals use specialized products and techniques to clear the fog efficiently.
- Lack of Time: Cleaning headlights can be time-consuming. If you have a busy schedule, leaving it to professionals saves time and ensures quality results.
Evaluate the condition of your headlights. If they’re not responding to DIY methods, it might be time to consider professional services.
What To Expect
Opting for professional services means expecting a comprehensive cleaning and restoration process. Here’s what typically happens:
- Initial Assessment: The technician examines your headlights to determine the level of cleaning required.
- Surface Preparation: The headlights are cleaned to remove dirt and debris. This step ensures effective restoration.
- Buffing and Polishing: Using specialized equipment, professionals buff and polish the headlights, removing scratches and restoring shine.
- UV Protection Coating: After cleaning, a UV protection layer is applied. This prevents future yellowing and extends the life of your headlights.
The entire process is usually quick, often completed within an hour. Expect to pay a fee for these services, but the results are often worth it. Headlights appear clearer and brighter, enhancing both safety and vehicle aesthetics.
Preventative Measures
Car headlights can get foggy over time. Dirt, grime, and UV rays often cause this. Cleaning them regularly is crucial. But it’s not enough. Taking preventative measures ensures they stay clear longer. This not only improves your car’s appearance but also ensures safety on the road. Learn about regular maintenance and protective coatings to keep your headlights in top shape.
Regular Maintenance
Regular maintenance of your car’s headlights can prevent fogginess. It keeps them bright and clear. Start by cleaning them every few weeks. Use a gentle car shampoo and a soft cloth. This removes surface dirt and grime.
- Wash headlights with a mild detergent.
- Rinse thoroughly with water.
- Dry with a microfiber cloth to prevent streaks.
Inspect the headlights for any damage during each wash. Look for cracks or scratches. Addressing these early prevents further damage. Additionally, check the bulbs to ensure they are working correctly. If one is dim or burnt out, replace it promptly.
Consider setting a reminder for regular cleaning. Mark it on your calendar or set an alert on your phone. Consistent maintenance keeps your headlights shining bright. Proper care extends their life and saves you money in the long run.
Protective Coatings
Applying a protective coating shields your headlights from damage. These coatings are like a shield against UV rays and road debris. They help maintain clarity and brightness over time. Choose a high-quality, UV-resistant product for the best results.
- Clean the headlights thoroughly.
- Apply the protective coating as per instructions.
- Let it dry completely before driving.
Consider using a ceramic coating for extra protection. It’s long-lasting and provides a tough shield. Wax can also be a good option. It forms a protective layer that can be reapplied every few months.
| Type of Coating | Duration | Benefits |
|---|---|---|
| UV-Resistant Coating | 6-12 months | Protects from sun damage |
| Ceramic Coating | 1-2 years | Durable and long-lasting |
| Wax | 2-3 months | Easy to apply and affordable |
Investing in protective coatings saves time and money. It keeps your headlights looking new. Plus, it enhances night driving safety. Regular application ensures your headlights remain clear and effective.


Frequently Asked Questions
How Do You Clean Cloudy Headlights?
To clean cloudy headlights, use toothpaste and a soft cloth. Apply toothpaste, scrub gently, and rinse with water. For stubborn haze, consider a headlight restoration kit. Always protect headlights with a UV-resistant sealant to maintain clarity. Regular cleaning ensures better visibility and enhances your car’s appearance.
What Is The Best Thing For Cleaning Car Headlights?
Use a mixture of baking soda and water to clean car headlights effectively. Apply with a soft cloth, gently scrubbing to remove grime. Rinse thoroughly and dry with a microfiber towel for a clear finish. This method is affordable and environmentally friendly, restoring clarity to your headlights.
Does WD-40 Fix Cloudy Headlights?
WD-40 can temporarily clear cloudy headlights by removing grime and oxidation. Clean headlights with a soft cloth after applying. For long-lasting results, use a headlight restoration kit. Regular maintenance ensures better visibility and safety.
How Do I Make My Headlight Glass Clear Again?
Clean headlight glass using a mixture of baking soda and water. Apply the paste, scrub gently, and rinse with water. Polish with toothpaste for extra clarity. Dry thoroughly with a microfiber cloth. Regular maintenance keeps headlights clear and bright.
Conclusion
Cleaning headlights is simple and improves visibility. Regular maintenance to clean headlights on a car keeps them bright and clear. Use household items like toothpaste or baking soda, which are cost-effective and easy to find. Follow the steps carefully for the best results. Clear headlights enhance safety on the road.
They also improve the car’s appearance. Try these methods to clean headlights on a car and see the difference. Regular cleaning prevents long-term damage. Enjoy safer and better night driving. Keep headlights clear and bright; it’s worth the effort for your safety.