How to Check Motorcycle Engine Oil Like a Pro Rider
Your motorcycle’s engine oil acts as its lifeline. When you regularly Check Motorcycle Engine Oil, you protect vital parts, maintain proper lubrication, and prevent serious engine damage.
But how do you know if your engine oil is at the right level or needs changing? Checking your motorcycle engine oil is simpler than you think, and doing it regularly can save you from costly repairs. You’ll learn easy, step-by-step methods to check your engine oil quickly and correctly.
Keep reading to make sure your bike runs smoothly and stays in top shape.
Checking your motorcycle engine oil is a simple task that helps keep your bike running smoothly. To do it right, you need a few basic tools. These tools help you measure the oil level and check its condition accurately. Using the correct tools makes the process quick and avoids damage to your engine.
Dipstick Or Oil Level Indicator
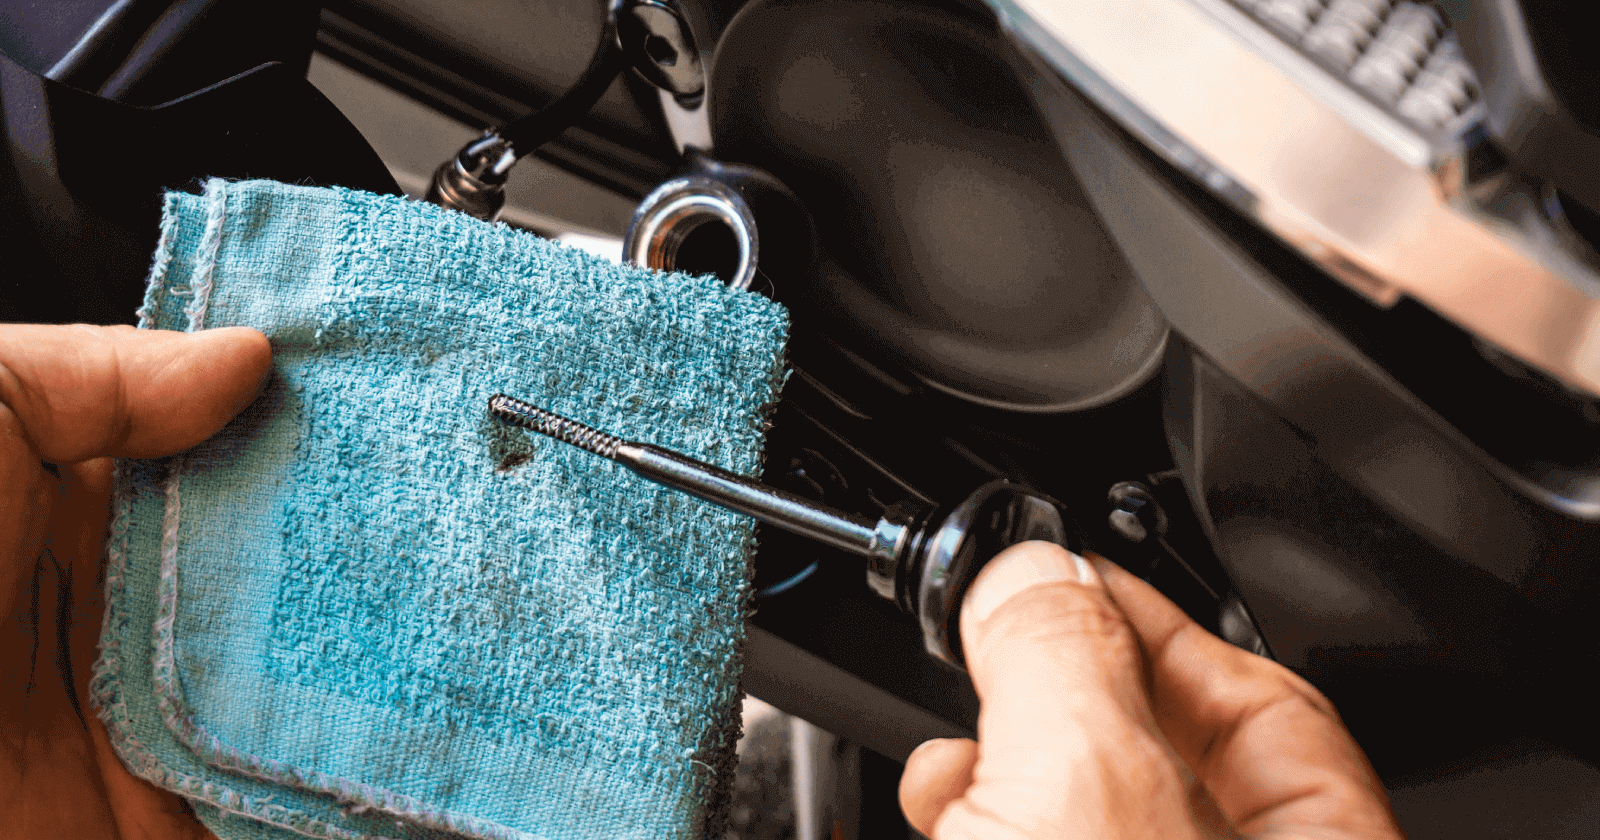
The dipstick is the main tool used to check the oil level in your motorcycle engine. Some motorcycles have a built-in oil level window instead. The dipstick is usually attached to the oil fill cap. Pull it out, wipe it clean, reinsert it, then pull it out again to see the oil level.
Clean Cloth Or Paper Towels
A clean cloth or paper towel is needed to wipe the dipstick before checking the oil. This removes old oil and dirt, giving a clear reading. Use a soft, lint-free cloth to avoid leaving fibers in the oil system.
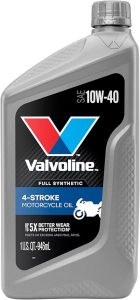
Valvoline 4-Stroke Motorcycle Full Synthetic SAE 10W-40 Motor Oil 1 QT, Case of 6
Wearing gloves protects your hands from dirty oil and chemicals. Nitrile or latex gloves are good choices. Gloves keep your hands clean and prevent skin irritation.
Flashlight
A flashlight helps you see the oil level clearly, especially in low light. Shine it on the dipstick or oil window to check the oil condition and level. This tool is useful for motorcycles with hard-to-reach oil indicators.
Oil Container (optional)
Keep a small container handy if you plan to add or change oil. Use it to pour oil cleanly without spilling. This tool keeps your workspace tidy and prevents oil waste.
Tool
Purpose
Notes
Dipstick / Oil Level Indicator
Measure oil level
Attached to the oil fill cap or built-in window
Clean Cloth / Paper Towels
Wipe the dipstick clean
Use soft, lint-free material
Gloves
Protect hands from oil
Nitrile or latex recommended
Flashlight
Improve visibility
Helps in low light
Oil Container (Optional)
Pour oil cleanly
Useful for topping up oil
Locate The Dipstick
Checking your motorcycle’s engine oil is a simple task. It helps keep the engine healthy and running smoothly. The first step is to locate the dipstick. This tool shows the oil level inside the engine. Finding it correctly makes the next steps easy and accurate.
What Is A Dipstick?
The dipstick is a thin metal rod. It fits inside the engine’s oil reservoir. You pull it out to check how much oil is in the engine. The dipstick has marks that show the minimum and maximum oil levels.
Where To Find The Dipstick On Your Motorcycle
The dipstick is usually near the engine block. Look for a small, round cap with a handle or grip. It might be labeled with “oil” or a small oil can symbol. Some motorcycles have the dipstick combined with the oil filler cap.
Tips For Locating The Dipstick Quickly
Park your motorcycle on a flat surface to avoid oil level errors.
Check the owner’s manual for the exact dipstick location.
Look near the engine’s side, usually on the lower part.
Clean around the dipstick before removing it to avoid dirt in the engine.
Prepare The Motorcycle
Before checking the motorcycle engine oil, it is important to properly prepare the bike. Preparing the motorcycle ensures an accurate oil level reading. This step helps avoid mistakes that could harm the engine. Taking time to prepare also makes the process safer and easier. Follow simple actions to get the motorcycle ready for the oil check.
Park On Level Ground
Place the motorcycle on a flat, even surface. This is key to getting a correct oil level reading. A tilted or uneven spot can give a false low or high reading. Use a paved driveway, garage floor, or a flat patch of ground. Avoid soft or sloped areas like grass or gravel.
Steps to park the motorcycle properly:
Find a level area that is stable and firm.
Use the side stand or center stand to keep the bike upright.
Ensure the bike is steady and not leaning excessively.
Turn off the engine and remove the key.
Here is a quick comparison of surfaces to park on:
Surface
Good for Parking?
Reason
Paved Driveway
Yes
Firm and flat, stable support
Garage Floor
Yes
Even surface, no tilt
Gravel or Dirt
No
Uneven and soft, unstable
Grass or Slopes
No
Slanted, may cause wrong readings
Parking on level ground helps the oil settle evenly inside the engine. This gives a true level on the dipstick or sight glass. It also prevents spills and accidents during checking.
Warm Up The Engine
Start the engine and let it run for a few minutes. Warm oil flows better and shows a more accurate level. Cold oil thickens and may give a false reading. Warming the engine also helps the oil spread inside the engine parts.
Follow these steps to warm up the engine correctly:
Turn the key and start the motorcycle.
Let it idle for 3 to 5 minutes.
Keep the bike on the stand and avoid revving the engine.
Turn off the engine before checking the oil.
Important points about warming up the engine:
Do not overheat: Keep the warm-up short to avoid damage.
Safety first: Keep your hands and clothes away from hot parts.
Check the owner’s manual: Follow any specific recommendations for your model.
Warming the engine helps the oil level stabilize. It also ensures the oil flows to the lowest points in the engine. This makes the reading on the dipstick or sight glass more reliable. Skipping this step can cause inaccurate checks and engine problems later.
Check The Oil Level
Checking the oil level in your motorcycle engine is a simple but important task. It helps keep the engine running smoothly and prevents damage. The oil lubricates engine parts and keeps them cool. Low oil can cause the engine to overheat or wear out faster. Regularly checking the oil level ensures your bike stays healthy and reliable. This section explains how to check the oil level properly.
Remove And Clean The Dipstick
The first step is to find and remove the dipstick. The dipstick is a thin metal rod that shows the oil level. It usually screws into the engine or oil tank. Follow these steps:
Make sure the motorcycle is on a level surface.
Turn off the engine and wait a few minutes to let the oil settle.
Locate the dipstick; it often has a bright handle for easy spotting.
Unscrew or pull out the dipstick carefully.
Wipe the dipstick clean with a soft cloth or paper towel.
Cleaning the dipstick is important. It removes old oil that can give a false reading. Use a lint-free cloth to avoid leaving fibers on the dipstick. If the dipstick is very dirty or damaged, replace it to get accurate results.
Tip
Reason
Use a clean cloth
Prevents false oil level reading
Check the dipstick condition
Ensures accurate measurement
Work on a flat surface
Gives the true oil level
Insert And Remove the Dipstick To Read the Level
After cleaning, put the dipstick back into its tube fully. This step lets the dipstick soak up the oil inside the engine. Follow these instructions for the best results:
Insert the dipstick gently but fully into the tube.
Wait a few seconds to allow oil to stick to the dipstick.
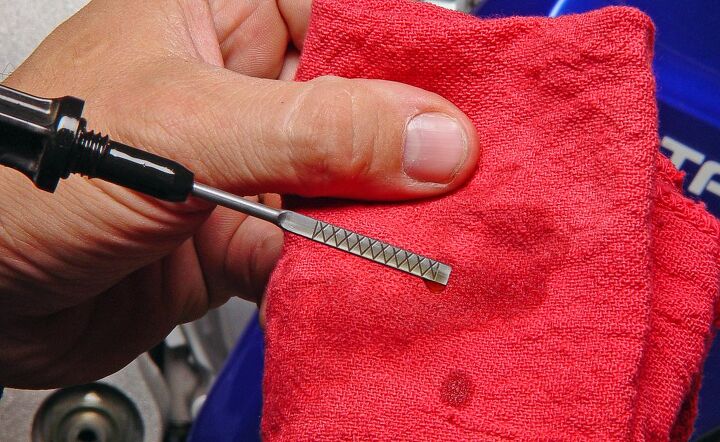
Remove the dipstick slowly and hold it horizontally.
Look at the oil mark on the dipstick carefully.
Compare the oil level with the marks on the dipstick.
The dipstick usually has two marks: minimum and maximum. The oil level should be between these marks. Below minimum means the engine needs more oil. Above maximum can cause oil leaks or damage. Clean the dipstick again before putting it back. Tighten it securely to prevent dirt from entering the engine.
Use this quick checklist to read the oil level:
Oil mark between minimum and maximum: Good
Below minimum: Add oil
Above maximum: Drain excess oil
Assess Oil Condition
Assessing the condition of your motorcycle engine oil is a key step in maintaining engine health. Clean oil keeps the engine parts running smoothly and protects against wear. Checking the oil condition helps spot problems early. It ensures the oil still does its job well and prevents engine damage. Simple checks on oil color and consistency reveal a lot about oil quality and engine status.
Check Oil Color
The color of engine oil shows its cleanliness and age. Fresh oil is usually light amber or golden. Over time, oil darkens as it collects dirt and combustion particles. Very dark or black oil means it needs changing soon. Some oil darkening is normal, but if the oil looks thick and muddy, it might be contaminated.
Use these steps to check oil color:
Remove the dipstick or oil filler cap.
Wipe the dipstick clean with a cloth.
Dip it back into the oil and pull it out again.
Look at the oil on the dipstick in good light.
Refer to the table below for common oil color meanings:
Oil Color
Meaning
Light amber/golden
Fresh oil, good condition
Dark brown/black
Used oil, change soon
Milky or cloudy
Water contamination, check engine
Thick and sludge-like
Old or degraded oil, immediate change needed
Clean oil keeps the engine cool and lubricated. Regular color checks prevent engine problems caused by dirty oil.
Check Oil Consistency
Oil consistency shows its ability to lubricate and protect engine parts. Good oil feels smooth and slippery between your fingers. It flows easily but is not too thin. Thick or gritty oil signals problems like dirt, metal particles, or oil breakdown.
Follow these steps to check oil consistency:
Take a small amount of oil from the dipstick or filler cap.
Rub the oil between your thumb and forefinger.
Feel if the oil is smooth and even.
Check for gritty or sandy particles.
Notice if the oil feels sticky or unusually thick.
Use this guide to understand oil texture:
Smooth and slippery: Oil is healthy and effective.
Gritty or sandy: Contaminated oil, change needed.
Sticky or thick: Oil breaking down, replace immediately.
Watery or very thin: Oil diluted, check for leaks or coolant mixing.
Maintaining proper oil consistency helps the engine run quietly and reduces wear. Regular checks catch problems early and keep your motorcycle in top shape.
Add Or Change Oil
Checking your motorcycle engine oil is important for keeping the engine running smoothly. Sometimes, you need to add oil or change it completely. This keeps the engine clean and prevents damage. Knowing how to do this right helps your bike last longer and run better. Follow simple steps to pick the right oil and fill it to the correct level.
Choose The Right Oil
Choosing the right oil is the first step. Not all oils work well with every motorcycle engine. The wrong oil can cause poor engine performance or even damage. Check your motorcycle’s manual for the recommended oil type. Look for the oil grade, such as 10W-40 or 15W-50. These numbers show how thick or thin the oil is at different temperatures.
Common types of motorcycle oils include:
Mineral oil – Basic and affordable, but needs changing often.
Semi-synthetic oil – A mix of mineral and synthetic, lasts longer.
Synthetic oil – Best protection and performance, but costs more.
Many oils also have additives to protect the engine and improve cleaning. Look for oils marked as JASO MA or JASO MA2. These are made for motorcycle engines with wet clutches.
Oil Type
Best For
Change Frequency
Cost
Mineral
Short rides, older bikes
Every 2,000-3,000 miles
Low
Semi-Synthetic
Daily use, moderate protection
Every 4,000-5,000 miles
Medium
Synthetic
High performance, long rides
Every 6,000-8,000 miles
High
Fill Oil To Proper Level
Filling oil to the right level is critical. Too little oil can cause engine parts to wear out quickly. Too much oil can cause leaks or damage seals. Always fill oil on a flat surface and with the engine off. Wait a few minutes after turning off the engine to let the oil settle.
Steps to check and fill oil:
Locate the oil dipstick or sight glass on your motorcycle.
Clean the dipstick with a rag, then reinsert it fully.
Remove the dipstick and check the oil level.
If low, add oil slowly in small amounts.
Recheck the level after each addition.
Use a clean funnel to avoid spills. Do not overfill. The oil level should sit between the minimum and maximum marks on the dipstick or sight glass.
Oil Level
Action
Below Minimum
Add oil carefully until the level reaches the minimum mark
Between Minimum and Maximum
Oil level is good, no action needed
Above Maximum
Drain excess oil to avoid engine damage
After filling, tighten the dipstick or oil cap securely. Start the engine and let it run for a minute. Turn off the engine and check the oil level again. This ensures the oil is evenly distributed inside the engine.
Common Mistakes To Avoid
Checking your motorcycle engine oil is a simple task that helps keep the engine healthy. Many riders make common mistakes that can give wrong results or even harm the engine. Avoiding these errors saves time and money. Below are some frequent mistakes to watch out for during the oil check process.
Using The Wrong Type Of Oil
Choosing the correct oil type matters a lot. Using oil not suited for your motorcycle can cause poor engine performance or damage. Always check your owner’s manual for the right oil grade and viscosity.
Checking Oil When The Engine Is Hot
Many check the oil immediately after riding. This is a mistake. Hot oil expands and gives a false reading. Wait at least 5-10 minutes after switching off the engine. This lets the oil settle back into the sump for an accurate level check.
Not Cleaning The Dipstick Or Sight Glass
Dirt or old oil on the dipstick or sight glass can hide the true oil level. Always wipe the dipstick clean with a cloth before inserting it back. This ensures a clear and reliable reading.
Overfilling Or Underfilling Oil
Both overfilling and underfilling cause engine issues. Too much oil can lead to foaming and poor lubrication. Too little oil risks engine wear and overheating. Check the oil level carefully and stay within the recommended marks.
Ignoring Oil Change Intervals
Checking the oil level is not enough. Old oil loses its effectiveness over time. Follow your motorcycle’s oil change schedule to keep the engine running smoothly.
Using The Wrong Method To Check Oil
Some motorcycles have dipsticks; others use sight glasses. Using the wrong method leads to wrong readings. Know your bike’s oil check method and follow it precisely.
Maintenance Tips
Regular motorcycle engine oil checks keep your bike running smoothly. Proper maintenance prevents engine damage and extends the engine’s life. Here are simple maintenance tips to help you check and care for your motorcycle’s engine oil properly.
Checking Oil Level On A Flat Surface
Always park your motorcycle on a flat surface before checking the oil. This ensures an accurate reading. Use the dipstick or oil window to check the level. The oil should be between the minimum and maximum marks.
Using The Right Engine Oil
Choose oil that matches your motorcycle’s specifications. Look for the right viscosity and type, such as synthetic or mineral oil. Using the correct oil keeps the engine parts lubricated and protects against wear.
Regular Oil Changes
Change your engine oil according to the manufacturer’s schedule. Old oil loses its ability to protect the engine. Frequent oil changes improve engine performance and reduce the risk of breakdowns.
Checking Oil Color And Consistency
Inspect the oil color and texture during checks. Fresh oil looks amber and clear. Dark or gritty oil means it needs changing. Thick or sludgy oil can clog engine parts.
Cleaning The Oil Filter
Replace or clean the oil filter with every oil change. A clean filter traps dirt and metal particles. This keeps the oil pure and the engine safe from damage.
Tools Needed For Oil Check
Tool
Purpose
Dipstick
Measures oil level accurately
Clean Cloth
Wipes dipstick for clear reading
Funnel
Helps pour oil without spilling
Oil Drain Pan
Catches old oil during changes
Frequently Asked Questions
How Often Should I Check My Motorcycle Engine Oil?
Check engine oil every 1,000 miles or at least once a month to keep the engine healthy.
What Is The Best Time To Check Motorcycle Engine Oil?
Check oil when the engine is cool or after it has been off for 5–10 minutes.
How Do I Know If My Motorcycle Oil Needs Changing?
Oil looks dark, thick, or smells burnt. Also, check the level on the dipstick.
Can I Check Engine Oil Without A Dipstick?
Most motorcycles have a dipstick or sight glass. Without them, consult your owner’s manual.
What Tools Do I Need To Check Motorcycle Engine Oil?
You only need a clean rag and the motorcycle’s dipstick or sight glass.
Conclusion
Checking your motorcycle’s engine oil keeps the bike running smoothly. Regular checks help avoid serious engine problems. Use the dipstick or sight glass to see the oil level. Always check oil when the engine is cool. Clean oil means better engine health and longer life.
Don’t wait for warning lights to act. Small steps like this save time and money later. Take a few minutes today to keep your ride safe. Easy and quick. A good habit for every rider.